 Guides Guides
Warping your Mini Card / Tablet Loom
Welcome to our virtual classroom. Over the last few years we have taught
weaving
classes on several of the looms we build and developed new looms to meet the
requests
of our students as well as a style of teaching different from most. I am
the first to admit
there are weavers with skills that surpass my own, many of which are my own
students,
the reward of a pure teacher.
My skill and interest is in loomwrighting, and weaving is a
secondary result of this
desire to work with wood and create the tools of the weaver. My primary
difference in
teaching probably comes from this different point of view as I emphasize
technique in
using the tools of the weaver and teach the students how the looms work as the
first step
in becoming a weaver.
Some of the other instructors that I have observed gear
classes to follow rigid printed
patterns in hand outs and use the class to demonstrate their skill. They
sometimes forget
the students are not yet peers in their subject and can leave a part of
the class confused
or frustrated. I teach without pre-done patterns and work with each group
as individuals.
This allows me to adjust the class progression, with the goal being each student
able to
recreate the work done in the class at a later time with the skills learned.
Items needed for
this class include:
* Loom appropriate for card weaving-
shown in this class is our Mini-Card Loom with a five foot warping length,
Other types of looms can be used with these directions such as;
our full size Card Loom 15 feet
inkle looms with a warp length of over 9 feet due to card clearance
backstrap looms
* Weaving shuttle or beater with separate thread winder for
weft
* 10 weaving cards
* Two balls each of two colors of thread-
for our Mini-Card loom cut each ball of thread twenty yards long (60 feet), for
other looms
cut the treads long enough to run the warp path of the loom to be used 11 times
to give
some extra for take up and tying at the end of the warping process
* Scissors

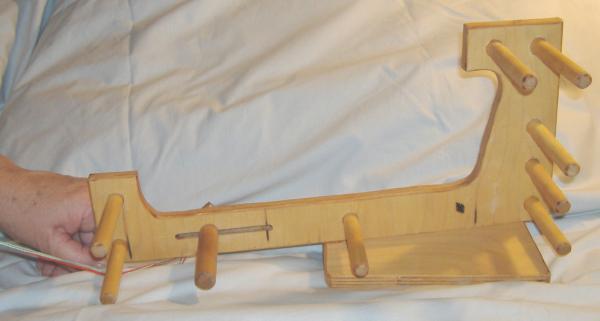
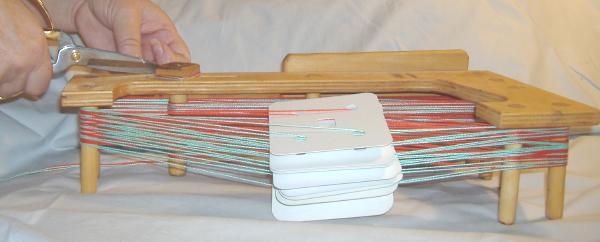
Gather all the supplies for warping the loom: Mini-Card Loom
with the tension bar set
where shown or 1/4 set back from highest tension setting if using a different
loom, shuttle,
cards and thread before you begin.

Take the 10 cards and make sure they are all facing the same
way and aligned the same.
I use cards that are lettered in the corners as shown, a-b-c-d in a clock wise
fashion if your
cards differ from this note the difference for adjustment to the directions
given.

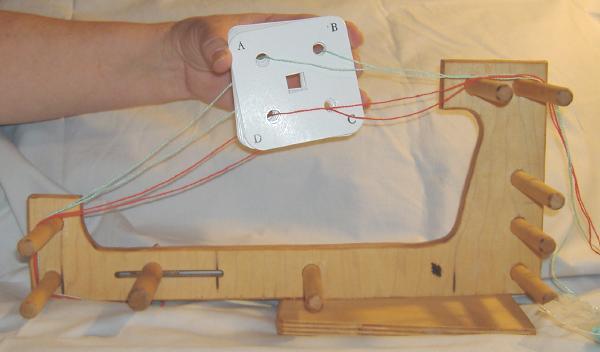
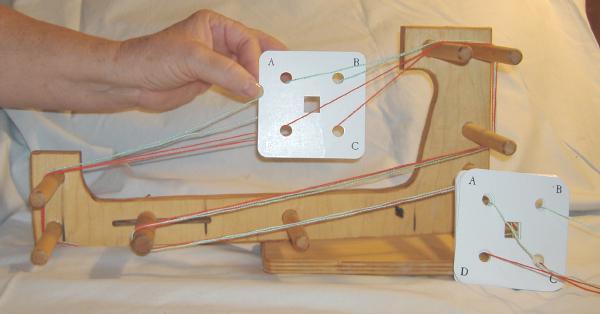
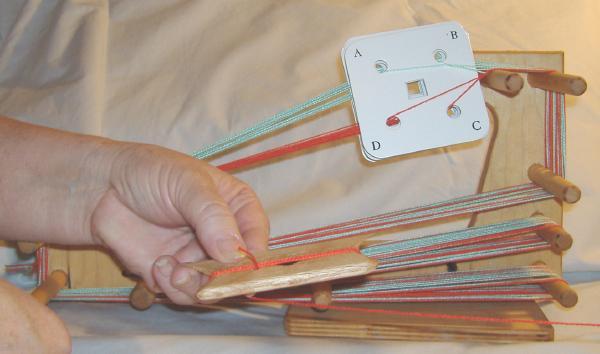
To start the warping process you must thread the warp thru
the cards to do this pick up
the entire book of cards at one time. Take the first color and feed the
tail from one ball
thru the hole labeled "A" and the other tail thru the hole labeled "B".
Take the second
color and do the same thing in the "C" and "D" holes. Make sure all
threads go thru the
cards in the same direction from the front of the cards to the back.

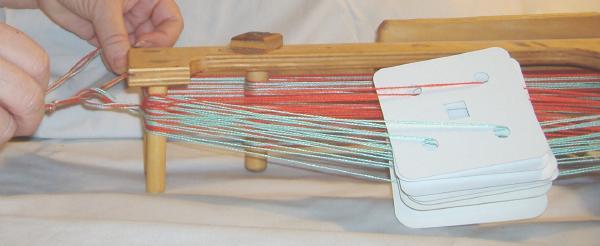
Gather all four tails together at the back of the cards and
tie a slip knot to bundle all your
warp threads together, hook the knotted end on the tension knob on the
back side of your
loom with the tension set as described above. This is only a temporary
anchor point while
warping and will be removed prior to the weaving process.
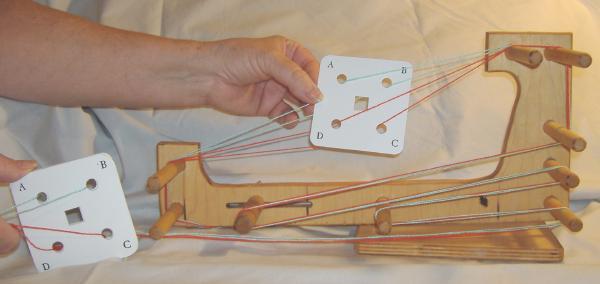
At this point bring your warp threads under the loom and
around the front two pegs to
begin warping the loom.
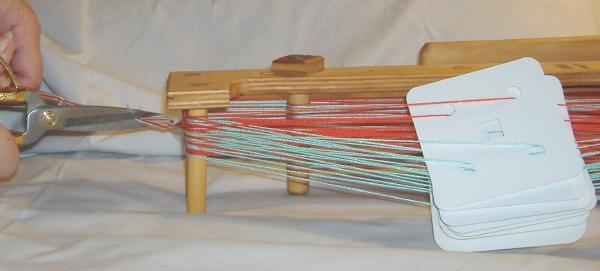
In the photo you can see where you will be dropping the cards
during the warping process,
later this is the working area where you will be turning the cards and weaving
with the shuttle.
As you are warping the loom and going around the pegs make sure to follow the
path shown
in the photos, once you have the first full warp path on the loom it is easy to
follow the same
pattern.
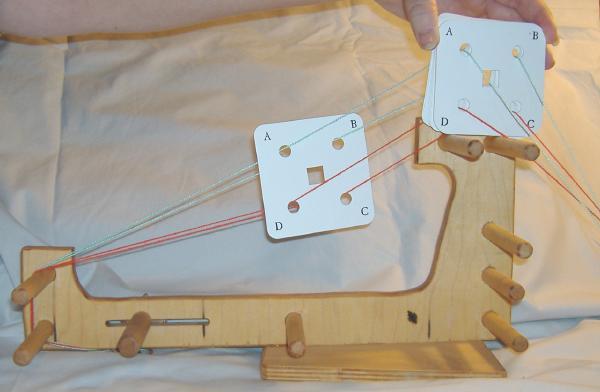
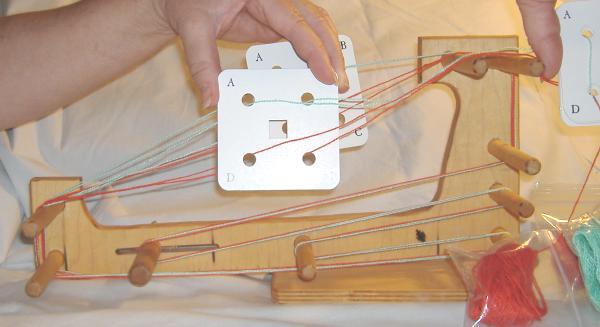
While in the working area drop the first card off the back of
your deck on the way to the
back of the loom. At the same time the rest of the deck remains in the hand as
you will
now follow the warping path of the loom.
Continue your threads around the top three pegs at the back
of the loom. By taking your
threads around the front two, and back three pegs you have created an expanded
area
for turning your cards and working your shuttle. The second advantage to
this design is
that while weaving and turning the cards extra tension is created and is
distributed over
five pegs, it allows the use of lighter weight material in construction without
compromising
on quality.
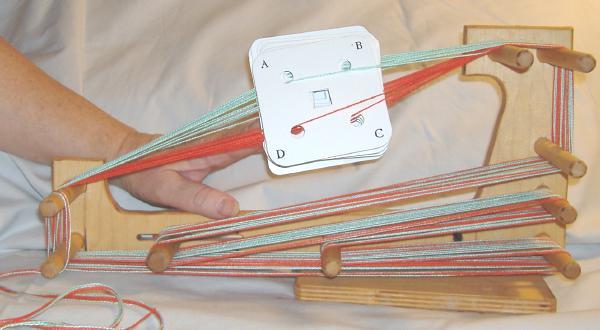
After going around the back three pegs you will go around the
tension peg. As you are
warping keep your tension consistent, firm not tight as this will keep the
tension equal
through the warping process. Start with your tension peg at the site shown in
the picture
(mentioned above). This allows for take up as the weaving progresses,
starting at this
spot gives you room to tighten the warp when you are ready to weave without over
tightening.
From the tension peg go around the next open peg down on the
back of the loom. Then
forward and around the bottom middle peg and then to the back of the loom and
around
the last peg on the back corner of the loom. Then bring all the threads
and cards back to
the front of the loom to where you began.
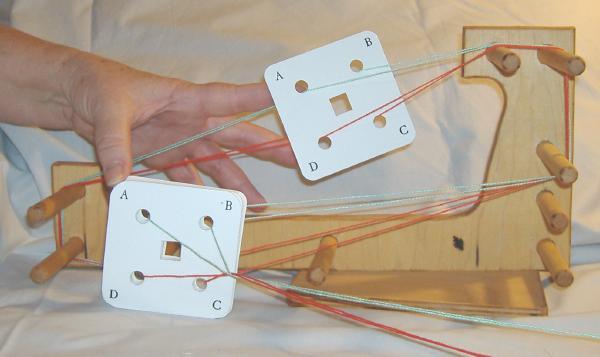
You have just completed your first and hardest warp path around the loom.
After this you
will just follow the same path and it is very easy to spot a mistake if you look
straight into
the loom as seen in the photos at the completion of every warp path. No group of
threads
should cross any other or deviate from this pattern.
As you start the second pass drop the next card off the back
of your deck and continue
around the warp path by following the threads laid down in the previous pass.
Continue in
this manner until all cards have been dropped in place.
After you drop your final card from the deck continue around
the loom until you reach the
front of the loom, this is a good time to double check your warp paths to make
sure all
threads are following the right path. If all looks good it is time to tie
off the warp and get
ready to weave.
Cut the original anchoring knot off the tensioning nut making
sure to remove stray threads
as the nut will now be used for tension purposes.
Bring the four threads from the start of the warp and the
four tails from the end of the warp
to the front of the loom and using a square knot tie all threads together,
keeping the tension
on these the same as you have maintained thru the warping process.
Cut off the excess tail after the knot is secured about 1/2 inch long to keep it from untying.
Start wrapping your shuttle with your weft thread, it can be
either of the colors that were
used during the warping process.
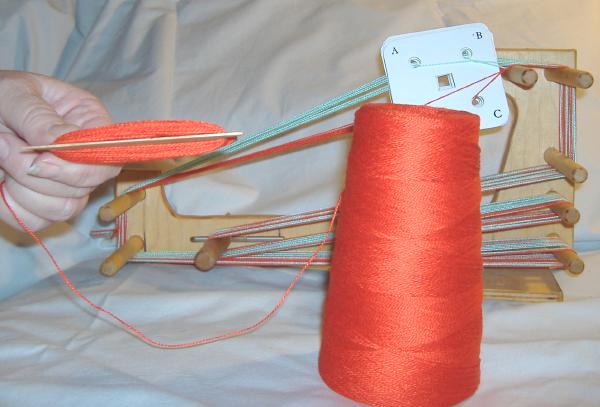
It is hard to guess the exact amount of thread required on
the shuttle. A little extra will not
hurt but you can always add if you come up short. The amount shown above
is more than
enough to finish this project.
Continue on to Page 2
Have a question? feel free to e-mail us for a little extra help.
See what's available at this time.
Copyright Gary
Palmer
All rights reserved.